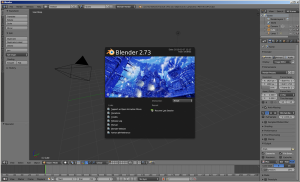
Transitioning from Blender to max can be a difficult process. I learned the hard way.
Having been a long time max user, I foolishly tried approaching everything the “max way”. You can’t. Max is max, Blender is Blender.
Although there are correspondences, the translation isn’t 1 to 1. They can be the same beast but they’re totally different animals.
So… to save other max users a lot of the hair pulling and frustration, I have compiled here a list of things that should, hopefully, make your transition to Blender smoother. Note: Below tips assume 3ds max configuration is being used for input.
1. The 3ds max startup configuration does a good job of translating some basic hotkeys and mouse actions in Blender but don’t expect complete translation. In 3ds max, for instance, if you want to go to an objects vertex sub-object, you press 1. In Blender, you have to press Tab first, then 1. And so on.
2. Elements sub-object. In max, you press 5 and you’re taken to the element sub-object. In Blender, there are only 3 official sub-objects: vertex, edge, and face. To get to the “element” sub-object, select any one vertex, face or edge, then Select > Linked (or press Ctrl + L).
3. Borders sub-object. In max, you press 3 and you’re taken to the Border sub-object. In Blender, to get to the “border” sub-object, go to Edit mode by pressing Tab. Then Select > Non-Manifold (or press Shift + Ctrl + Alt + M).
4. Right click. In 3ds max, pressing the right mouse button brings up a menu. In Blender, under the 3ds max preset, pressing the right mouse button sets the location of the cursor.
5. Creating primitives/ the cursor. The cursor is alien to 3ds max users. In 3ds max, when you want to create a box, you click on the box button in the Create dialog, then drag your mouse on the viewport. In Blender, you click on Add (or press Shift + A) then choose the kind of object you want to create and the object pops up in the viewport right where the cursor is located.
6. Changing the primitive’s segments. In 3ds max, when you create a primitive, you can set the dimensions and other parameters under the create panel. After creation, you can go to the modifier panel and edit the parameters. As long as the primitive is not collapsed into mesh or poly, you can go back and edit the number of segments, etc. In Blender, its a one way street. After creating a sphere, for example, a dialog containing the parameters appear. There you can edit the number of segments, rings, etc. After that, however, you can’t go back. So, you need to think of your segments thoroughly especially when creating spheres.
7. The active camera. In max, whichever camera is selected is the active camera. When you press C, your viewport changes to that camera. In Blender, there is only one active camera at a time. Even if you have numerous cameras, pressing C will always go back to that one active camera. To set a different active camera, go to Scene tab > Scene panel > Camera.
8. Smooth shading. In max, the viewport shading default is smooth. In Blender, you have to explicitly set the shading to smooth, otherwise, you’ll get a faceted sphere. To set shading to smooth, under Tools tab > Edit panel > Under Shading, click the Smooth button.
9. Collapsing edges. In max, pressing Ctrl + Backspace while having edges selected will collapse the edges and the corresponding vertex. In Blender, you can press delete. A menu pops up. Select Dissolve edges. Then, a panel appears. Select Dissolve verts.
10. Modelling Terminologies.
- a) Chamfer. In Blender, Bevel.
- b) Connect (Edge). In Blender, Subdivide.
- c) Cut. In Blender, Knife.
- d) Attach. In Blender, Join. In vertex mode, Join is the equivalent of Connect.
11. Modifiers.
- a) Meshmooth. In Blender, Subdivision Surface.
- b) Shell. In Blender, Solidify.
- c) Optimize. In Blender, Decimate. The options are a little different but they accomplish the same task.
- d) Symmetry. In Blender, Mirror.
12. FFD vs Lattice. In Blender, FFD is called Lattice. The process, though, is a little different. In max, you add an FFD modifier to your object. Then go to the FFD’s sub-object and manipulate the controllers. In Blender, the lattice used to deform the object is created separately with Add>Lattice. Then, you put a Lattice modifier on the object you want to deform, point to the Lattice created earlier, then manipulate the lattice.
13) Pivot. In Blender, the Pivot is called Origin. To move the Origin, under the Tools tab, choose the options on the dropdown box named Set Origin. Unlike in 3ds max where you can interactively move the pivot with your mouse to set a custom pivot point, in Blender, you position the Cursor to where you want the pivot to be, then Set Origin > Choose Origin to 3D Cursor.
14) Groups. In 3ds max, when you create a group, it becomes one entity. And you are able to manipulate it as one entity. In Blender, the concept of Groups is more akin to Selection Sets. The closest thing to a max style grouping in Blender is Parenting, which is similar to 3ds max parenting. Select all the objects you want to become a group. Go to Object > Parent (or press Ctrl + P). The last object selected will become the parent.
15) ResetXForm. In 3ds max, to reset an objects transformation, you access the utilities panel and click on Reset XForm button. This will reset all transformations. In Blender, you have the choice of resetting only a certain type of transformation. Go to Object>Apply>Then choose the type of transformation you want to reset.
16) Isolate Selection. In Blender, press Numpad key /.
The above list is by no means complete and I will be adding to this as I learn more about Blender. In the future, I intend to compile this into some sort of easy to digest manual.
In the meantime, I hope this somehow eases some of the transition pains that others like me out there might go through.


